Q: How do I share files from OneDrive/SharePoint with students?
The easiest way is to create a folder and store all files that you wish to share in the folder. You can then follow the steps below to share the link of the folder with students. Through the folder link, students will be able to access all files stored in the folder – there is no need to configure the link for each file separately.
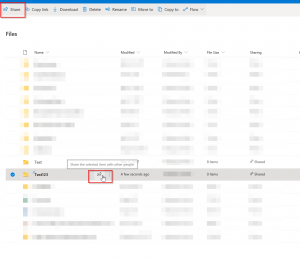
Step 1: Select the folder you wish to share and click on “Share” from the top menu or from the sharing icon seen below.
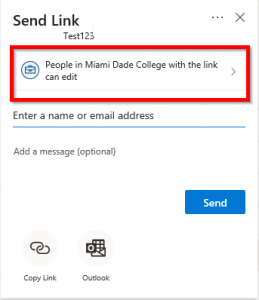
Step 2: The “Send Link” dialog box will pop-up. The default is to share within mdc.edu domain; to share with students with mymdc.net email addresses or any non-mdc.edu email addresses, click on “People in Miami Dade College with the link can edit”.
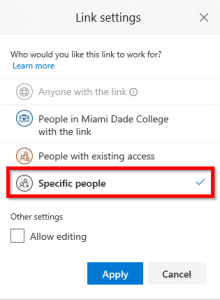
Step 3: The “Link Settings” dialog box will pop-up. Note that the option “Anyone with the link” will not be available. Select “Specific people”. Check “Allow editing” if you would like to allow the students to add/delete files from the folder. Click “Apply”
Step 4: The “Send Link” dialog box will pop-up again. Enter email addresses of the students, then click “Send”.
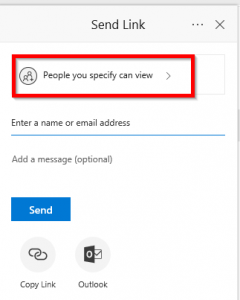
Moving forward, you can manage sharing as follows:
Step 1: Select “Shared” from the left menu bar, then select “Shared by you” from the top menu bar.
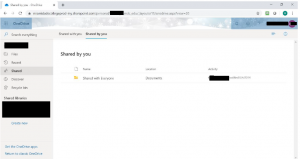
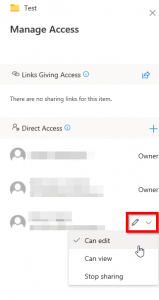
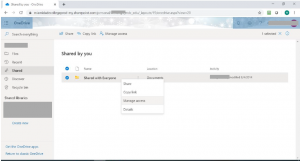
Step 2: Right-click on the file or folder, the context menu for the item will pop-up. Select “Manage access” from the menu. The “Manage Access” dialog box will pop-up.
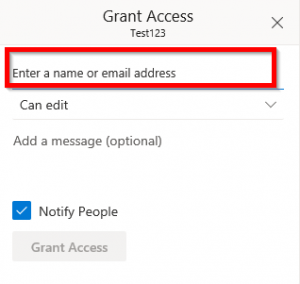
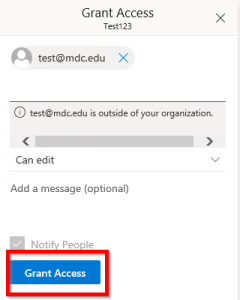
To add new students click on the + icon next to the “Direct Access” option and then enter their emails, once all entered click on Grant Access.
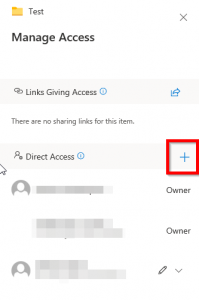
To remove/modify access select on the drop down arrow next to the user and modify your option.
